Recipes for special diet treats are always welcome in my mailbox! How about yours? If you said, yes, you may want to follow this link to Dr. Amy Myer's post, "My Top 5 Treats for an Autoimmune-Friendly Halloween".

Showing posts with label stevia. Show all posts
Showing posts with label stevia. Show all posts
October 14, 2018
November 29, 2013
Stop the Cravings Chia Biscuits-(free of gluten, grain, dairy, egg, nut, soy, and sugar)


I love biscuits! Do you? If you are like me, a girl who loves biscuits, but must adhere to a rather strict healing diet, I believe you will be pleased to have this recipe in your repertoire. I created this recipe to accommodate my "free of" requirements (free of: grains, gluten, nuts, eggs, soy, sugar, dairy) and to stop my cravings for biscuits.
Before traveling, I am usually baking these biscuits to take along to keep my hunger at bay. They have seen me through many road trips. When not traveling, they are my favorite snack eaten hot from the oven or topped with pear butter spread for a delicious treat. I even like to squeeze my juicy grass-fed burger in these for a moment where I feel complete bliss with nothing missing or lacking! Until they fall apart as the hot burger melts the coconut oil, but that doesn't bother me at all. (Grain-free and egg-free baking does have its ups and downs!)
So you see, this recipe I created just for myself and I happily enjoy them!
In my opinion, these biscuits are full of super nutrients. The healthy, delicious and nourishing foods like coconut oil and chia seeds make this biscuit healthy like no other biscuit I know of.
In case you are wondering... What is the big deal about chia seeds? Chia seeds are a wonderful super food that I became acquainted with while looking for a great egg replacer. I think you will be delighted to learn that chia seeds contain eight times more essential omega 3's than salmon. Omega 3's in chia seeds have been clinically shown to be effective in preventing and reversing high cholesterol and heart disease. I think you get the idea that chia seeds are a healthy choice. There is much more to learn about them, but if I tried to tell you much more this post would get quite lengthy.
It is enough for me that "Chia" is the Mayan word that means "strength". I am all about adding food that gives me strength!
The coconut oil is a marvelous source of medium chain fatty acids which is the closest thing in nature to human breast milk. Researchers have concluded that 3.5 tablespoons of coconut oil a day is equal to the MCFA that a breastfeeding infant would consume in a day.
I will let you in on a little secret. These biscuits make me feel really satisfied and calm. Thus the name "Stop the Cravings Chia Biscuits": I often wondered why when I ate my biscuits in the morning and was busy making breakfast for the boys, cleaning the kitchen (many times dishes from the night before :() I felt as if I had eaten a big breakfast. My energy was good and all I ate was my biscuit. Really, I would have a brief moment trying to remember did I eat breakfast?
As usual, my curious nature had to find out "Why?"
What is the magic inside these biscuits?
The chia seeds?
I had to do a little researching to figure this out. That is when I found a video segment from the Dr. Oz Show, which I believe reveals a little "secret" about chia seeds. Dr. Oz's video, Try Chia Seeds to Stop Snacking, explains the wonders of chia seeds. After watching this video, my theory is that the addition of the chia seeds to the recipe is making me feel full. Dr. Oz illustrates this extremely well in the video. Plus, I am adding the healthy fats from the coconut oil which is keeping me full and feeling satisfied for a while. Anyway, I believe it's a winner. I like his tip, especially if you need assistance in feeling satisfied and overcoming cravings.
What do you think? Would you drink your chia seeds? Personally, I would rather eat my biscuits than drink chia seeds, but I will leave that decision to you. I love my biscuits and I share them just in case you are like me.
Stop the Cravings Chia Biscuits
Gluten-free, Grain-free, Dairy-free, Egg-free, Nut-free*, Soy-free, Sugar-free
- 7 tablespoons (1/2 cup minus 1 tablespoon) coconut oil (I use Tropical Traditions Organic Expeller-pressed. It does not have a strong coconut flavor - See blog sidebar for affiliate link.)
- 3 Tablespoons ground chia seeds (I use Navitas Naturals chia seeds, ground in a dedicated coffee grinder) or Navitas Naturals Sprouted Chia Powder (easiest to digest)
- 3/4 cup full fat, canned coconut milk, - (Natural Value is BPA-Free and guar gum-free) (or 2 heaping tablespoons of coconut creme concentrate and 3/4 cup water) or sparkling water (See my notes at the bottom of this post)
- 1 Tablespoon lemon juice, freshly squeezed or organic apple cider vinegar
- 3 Tablespoons Kime's Pear Butter Spread
- 9 drops stevia liquid (I use Body Ecology brand)
- 1/2 cup coconut flour (I like Tropical Traditions - see blog sidebar)
- 1/2 teaspoon baking powder
- 1/2 teaspoon baking soda
- 1/8 teaspoon sea salt
- Preheat oven to 350 degrees Fahrenheit
- Line a large baking sheet with parchment paper.
- Melt coconut oil in a medium-sized saucepan over medium low heat.
- Add to the saucepan the ground chia seeds, coconut milk, lemon juice/apple cider vinegar, pear butter spread, and stevia. Stir with a spoon.
- Add the dry ingredients - coconut flour, baking powder, baking soda and sea salt to the saucepan and stir until mixed well.
- Shape into biscuits with a spoon and your hands. Place biscuits on the parchment lined baking pan. Makes 10-12 biscuits.
- Bake for about 25 minutes.
- Store in the refrigerator unless on the road!
Notes: .
Why is important to seek out BPA-Free products?
In a nutshell, BPA blocks the methylation cycle which is crucial for the body to detoxify and make glutatathione, the master antioxidant. For each toxic molecule, we need a molecule of glutathione to remove the toxin from our body. That is vitally important for good health!
If you are healing your gastrointestinal system then you most likely want to avoid guar gum. Avoiding this additive makes a noticeable difference in my digestive system.
If I was unable to find BPA-free and guar gum-free canned coconut milk I would experiment and figure out how to make my own with shredded coconut and water. That is on my "to learn someday" list.
Over time, I have decided I love using the sprouted chia seed powder in this recipe. The sprouted version is highly digestible and my body likes it best. It is higher priced, so I leave that choice up to you.
Blogger Disclosure: I am an affiliate with Tropical Traditions, because I love and use their products in my recipes. Just so you know, if you are a new customer and purchase Tropical Traditions products through my blog links I earn a gift certificate of $25.00 for the referral. .
Why is important to seek out BPA-Free products?
In a nutshell, BPA blocks the methylation cycle which is crucial for the body to detoxify and make glutatathione, the master antioxidant. For each toxic molecule, we need a molecule of glutathione to remove the toxin from our body. That is vitally important for good health!
If you are healing your gastrointestinal system then you most likely want to avoid guar gum. Avoiding this additive makes a noticeable difference in my digestive system.
If I was unable to find BPA-free and guar gum-free canned coconut milk I would experiment and figure out how to make my own with shredded coconut and water. That is on my "to learn someday" list.
Over time, I have decided I love using the sprouted chia seed powder in this recipe. The sprouted version is highly digestible and my body likes it best. It is higher priced, so I leave that choice up to you.
Blogger Disclosure: I am an affiliate with Tropical Traditions, because I love and use their products in my recipes. Just so you know, if you are a new customer and purchase Tropical Traditions products through my blog links I earn a gift certificate of $25.00 for the referral. .


September 26, 2012
Brownie Chocolate Chip Cookies - Free of: Grains, Gluten, Eggs, Casein, Sugar*

Brownie Chocolate Chip Cookies
A grain-free and sugar free diet may not be the easiest diet to follow, but you know I am absolutely grateful that the diet I eat is a health and life giving diet. I am looking back with eyes that see how I was being led in the right direction for the best health. My thoughts lately have been a lot about sugar and how detrimental sugar is to health. Specifically, I am pondering the recommendations of drastically reducing sugar for cancer prevention.. (I find all nutrition studies very interesting.) It makes sense to me because sugar weakens the immune system. My studies have taught me that the body turns grains into sugar. It is after reading these studies that I am totally grateful I have eaten sugar-free for the past 11 years or longer and grain-free for 2 years. Grain-free was my missing puzzle piece.
My readers may know that my boys have been riding along with me on my "sugar-free" diet for quite awhile. My blog has a mixture of recipes...most that my boys like, but always low in sweeteners and most often use stevia. Some of my blog posts share recipes that my boys are allowed to eat, but I may not be able to eat due to the fact that I began slowly introducing small amounts of raw honey into their diet this past year. I think they are doing well with it. They are pretty happy with this diet change.
Most of the recipes I share are the recipes that I feel meet the needs of most readers or may be easily adapted. I may be a bit shy sharing my candida-friendly recipes for fear that no one except me would eat them! Maybe that will change, but for certain I don't feel I can label my recipes as candida-friendly for everyone. After all, I am not a doctor, so I don't give medical advice! ;) I just share what works for me and my family.
My boys are now 17 and 11 (for one more week). It is a balancing act to guide and teach our children, but yet at some point we need to let out the ropes, so to speak, and allow them to learn about food and their bodies. We hope that our teachings will be past down to generations to come and that our firm stance against "bad" unfood will produce healthy eating habits and not rebellious eaters.
This week, I have had the pleasure of observing my teenage son while he has been studying the Real Food and Nutrition E-Course written by Kristen Michaelis. You may know Kristen as the writer of the popular blog Food Renegade.com.. The lessons in this E-Course reinforce the healthy lifestyle and principles that I have adopted in our home. It excites me that my son is gaining knowledge about "real" food in this e-course.
I love that he wants to engage in conversation about the cool things he is learning about health and nutrition regarding whole unprocessed food. Today he asked me, "What is buttermilk?" Then he decided to research for himself just how to make it with non-dairy milk and told me he wants to make pancakes next time with "buttermilk". I am delighted to see this spark of interest in the food he eats and especially that he wants to cook for himself.
Hopefully, my story will encourage you to keep on setting a healthy example for your family and one day you will see that they will understand. It is all worth the effort to have a healthy family.
Okay, so here I share with you a healthy cookie to enjoy while I ponder more about sugar....
With our love to you!
Brownie Chocolate Chip Cookies
Free of: Gluten, Grains, Casein, Eggs, & Sugar*
Preheat oven to 350 degrees Fahrenheit
Equipment:
- electric mixer
- "Measure-All" wet dry measuring cup -optional, but very helpful for measuring
First, mix the wet ingredients in the electric mixer bowl.
Wet ingredients:
- 2 Tablespoons chia seed meal
- 10 Tablespoons applesauce (1/2 cup + 2 T)
- 5 Tablespoons palm shortening
- 15 drops stevia
- 2 Tablespoons honey
- 1 Tablespoon apple cider vinegar
Add in dry ingredients and mix well.
Dry ingredients:
- 3 Tablespoons raw cacao powder
- 1/4 teaspoon sea salt
- 1 cup pecan meal
- 1/2 cup coconut flour
- 1/2 teaspoon baking soda
- 1 teaspoon baking powder
Shape into small cookies with your hands. They do not spread out on their own so they need a little help from you.
Press Enjoy Life Chocolate chips into the top of each cookie before baking
*To be truly "sugar-free" you will need to leave this brand of chocolate chips off.*
(Today I saw a recipe for DIY homemade chocolate chips made with honey and I would love to make them for my boys. If you have made them I would love to hear from you.)
Bake 10 minutes on parchment lined baking sheet.

September 2, 2012
Orange Creamy Custard (gluten and dairy-free)

A little back-to-school treat for my home schooled boys...
At the moment, I am up to my eyeballs in school books and I am finding joy as I see all I have accomplished in organizing and preparing for school. Thankfully, I have more energy this week to tackle this task. This is a welcome change! One thing for sure, I have hungry, growing boys and cooking and baking AND school must go on!
I made this custard for the boys and they loved it and are requesting it again today. I expect I will need to teach them how to make this as I have tons to do before school starts next week.
This custard is creamy and delicious and a great high protein treat A healthy comfort food for my dairy-free boys. I shared my ideas with the boys of all I imagined we could do with this recipe, but my youngest son declared..."It is good all by itself." Nothing else needed. So here I give you my simple, but delicious easy recipe...just the way he likes it..
Hope you enjoy it, too!
Orange Creamy Custard
Gluten, Grain, Dairy and Refined sugar free
1 1/2 cup coconut milk ( I used a mix of my leftover cans in the frig....full fat and light)
3 organic egg yolks
1/2 Tablespoon Tapioca Flour
10 drops stevia liquid
1 1/2 Tablespoons raw organic honey
1/8 teaspoon orange flavoring
Add coconut milk, egg yolks, tapioca flour, stevia, honey and flavoring to a saucepan and heat on medium heat stirring with a whisk. Mix well.. Continue whisking occassionally as it begins to boil. Stir with the whisk constantly as the custard simmers for 8-10 minutes.
Recipe Serves 2 Happy Boys
March 1, 2012
Coconut Shortbread - (Free of: gluten, grains, casein, eggs, corn, sugar)

The doorbell rang and there she stood, a cute young girl from the neighborhood holding a bag in her hand. At that point I knew she had some pretty important goods in her bag. You see, she was delivering Girl Scout cookies to my husband. I accepted the bag of cookies, but dared not peek inside the bag or lay my sugar-free eyes on them. The memories of shortbread cookies and Thin Mints I ate pre-gluten-free are somehow etched in my mind. When I was a Girl Scout I sold cookies, but truthfully, I probably bought more for myself to eat. After all, a year was a long time to wait for those cookies....
I suppose my tactics of looking the other way has come in handy over the years in turning my health in the right direction. I know myself and that means I know my weaknesses all very well. Cookies and sugar were my weakness. Notice I said "were," okay? But like any reformed sugar addict I know I must be careful to avoid thoughts of cookies with sugar. So as I walk past the bakery case in the grocery store, or accept goodies at my front door, I direct my eyes elsewhere. Why tempt myself?
Sugar is fuel to the fire.
A few months ago the test came back. The test that meant I had high levels of yeast overgrowth still going on in my body...yes, after all these years of treatment and adhering to my sugar-free diet. What a bummer for sure. But then it was a good thing, at least, to have a medical doctor who believed my story and could test yeast and therefore guide me in a more rigorous treatment plan.
I started this stronger anti-yeast plan and complications temporarily put a stop to my treatment. The toxins released from the yeast die-off were overwhelming my body. I've been through this numerous times, but this time was different. After consulting with my doctor, now I have a revised plan that will address the nutrient detoxification needs, as well as killing off the bad level of yeast overgrowth, restoring the good bacteria, and gut repair.
I'm a bit nervous, but I am gaining my confidence by increasing the detox nutrients and noting as I write this post that my brain is clearer already.
A few months ago the test came back. The test that meant I had high levels of yeast overgrowth still going on in my body...yes, after all these years of treatment and adhering to my sugar-free diet. What a bummer for sure. But then it was a good thing, at least, to have a medical doctor who believed my story and could test yeast and therefore guide me in a more rigorous treatment plan.
I started this stronger anti-yeast plan and complications temporarily put a stop to my treatment. The toxins released from the yeast die-off were overwhelming my body. I've been through this numerous times, but this time was different. After consulting with my doctor, now I have a revised plan that will address the nutrient detoxification needs, as well as killing off the bad level of yeast overgrowth, restoring the good bacteria, and gut repair.
I'm a bit nervous, but I am gaining my confidence by increasing the detox nutrients and noting as I write this post that my brain is clearer already.
Since diet
is
extremely important to good health and especially crucial when treating yeast overgrowth, I knew if I wanted
anything that resembled a
Girl Scout cookie, I would have to create my own cookie to be stevia-sweetened with no
starches or grains. Clearly, my favorite Girl Scout cookie was the shortbread.
Plain shortbread. I know, a bit boring, but that is what I liked. I'm happy now that a simple shortbread was my favorite cookie, so now it's very easy to create something that satisfies the shortbread desires for this once upon a
time Girl
Scout...
Thank you to the Girl Scout Shortbread cookie for inspiring me to make this healthier cookie for myself and anyone else wanting to eat grain-free and sugar-free along with me.

Press out the shortbread dough with hands onto parchment paper into a 9" circle on your baking pan. I use my round pizza pan.
Bake 350 degrees for 12 minutes.
 The coconut oil version browned slightly on the edges, but the palm shortening version did not.

Allow to cool a little before cutting and handle carefully to avoid breaking. Refrigerating the shortbread will help it hold together but we like it hot even if it does crumble.
My boys like to eat this "bread," as they call it, and slather butter all over the top. Sometimes jelly, too. There are ways to make everyone happy in this household.
Coconut Shortbread
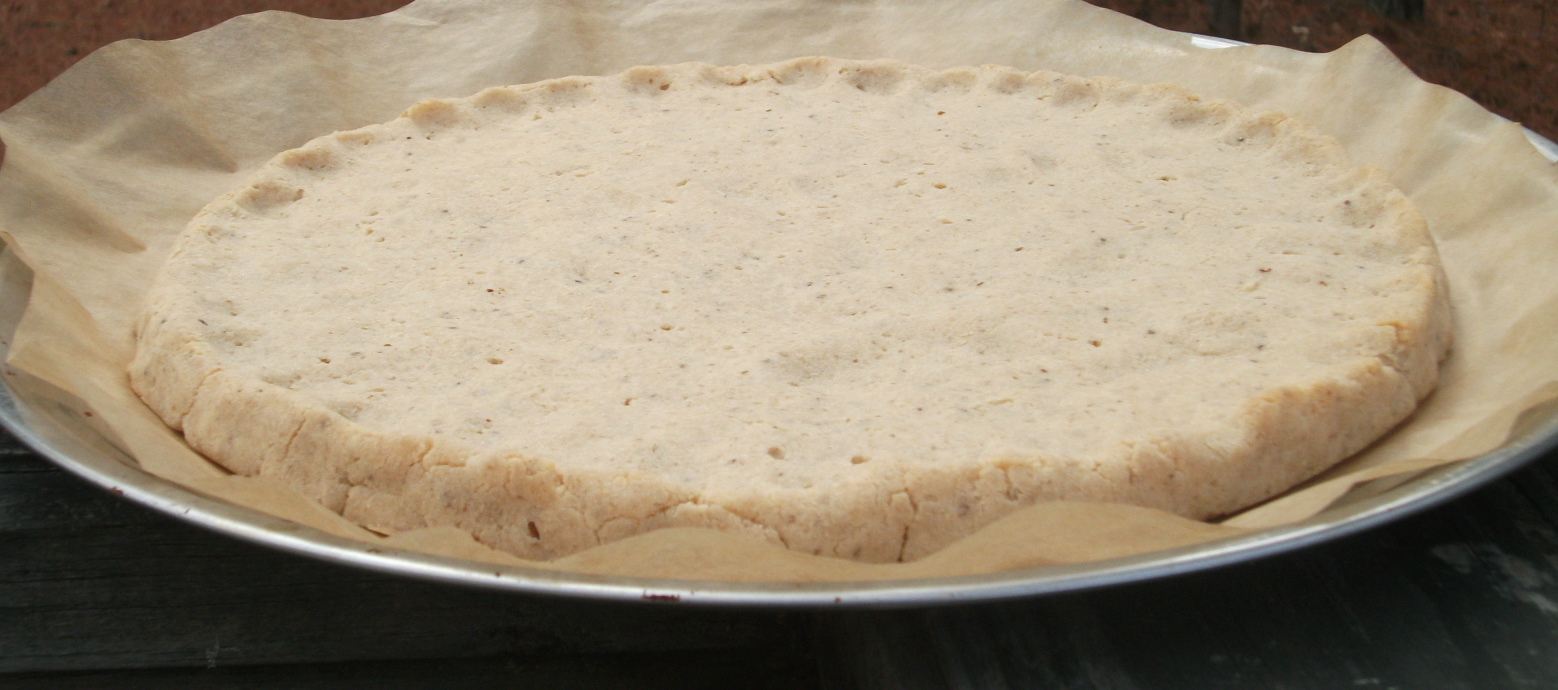
I use my electric mixer for this recipe.
In the mixing bowl add and mix well:
- 1 tablespoon chia seed meal
- 1/2 cup plus 2 tablespoons unsweetened organic applesauce
Then add the following ingredients and continue to mix together:
- 1/2 cup plus 2 tablespoons organic coconut oil or organic palm shortening
- 20 drops stevia
- 1/8 teaspoon sea salt
- 3/4 cup organic coconut flour
Bake 350 degrees for 12 minutes.


Allow to cool a little before cutting and handle carefully to avoid breaking. Refrigerating the shortbread will help it hold together but we like it hot even if it does crumble.
My boys like to eat this "bread," as they call it, and slather butter all over the top. Sometimes jelly, too. There are ways to make everyone happy in this household.
A few notes:
1. The 58% fiber content of coconut flour puts it at the top of the fiber chart compared to other flours. Wheat bran, while known for high fiber, is much lower at 28% fiber. This increase in fiber goes along with my new plan to combat yeast overgrowth. So one more reason that this "cookie" is a winner for me or anyone wanting to increase their dietary fiber. Just remember with the high fiber content it is important to drink lots of fluids. Be sure to have your favorite hot tea or glass of water with your shortbread cookie.
1. The 58% fiber content of coconut flour puts it at the top of the fiber chart compared to other flours. Wheat bran, while known for high fiber, is much lower at 28% fiber. This increase in fiber goes along with my new plan to combat yeast overgrowth. So one more reason that this "cookie" is a winner for me or anyone wanting to increase their dietary fiber. Just remember with the high fiber content it is important to drink lots of fluids. Be sure to have your favorite hot tea or glass of water with your shortbread cookie.
Thank me in the morning. :)
2. Do you have an overgrowth of yeast? If you think you might have a yeast problem contributing to illness, Dr. Crook's questionnaire may you help to find out.
3. FAQ - The benefits of coconut oil at Tropical Traditions.
More Girl Scout Cookie recipes on the web:
If shortbread isn't your thing, my friend, Jules Shepherd, compiled a list of Gluten-free Girl Scout Cookie recipes on the blogosphere here.
3. FAQ - The benefits of coconut oil at Tropical Traditions.
More Girl Scout Cookie recipes on the web:
If shortbread isn't your thing, my friend, Jules Shepherd, compiled a list of Gluten-free Girl Scout Cookie recipes on the blogosphere here.
December 3, 2011
Carrot Cake - Free of grains, gluten, dairy, eggs, corn, soy, sugar, starch, gums

My sweet husband, Scott,  has been my inspiration to create this yummy allergy-friendly carrot cake. His favorite cake of all time is carrot cake and this week was his birthday.

A few years ago I designed a gluten-free sugar-free carrot cake, but now that we are eating grain-free it was time to create a new recipe. I asked him what he specifically liked about carrot cake and he described a chunky cake with nuts and raisins.

My first thought was to make a cake for him, but that I would just not eat it. That would be good - he would be happy... When I mentioned this, Scott encouraged me to make a cake that all of us could eat, even me.  That is what he wanted (I really wanted this too.)

I decided to use my biscuit recipe as a starting point, and played with it a bit. Since the batter is grain-free, sugar-free, starch-free and (amazingly) egg-free, it looked very different than traditional cake batter.  I had to smooth it into the shape I wanted. At first look, I didn't think it would work, but I knew I had to start somewhere. Instead of making full, 9-inch cakes, I baked two cupcakes to see how it would work.

When I removed the test cakes from the oven I had low expectations... until I tasted it.  I was amazed at the wonderful moist cake.  It was a winner!  I could have just danced! But instead of dancing, we cooked the rest of the batter, and ate and ate and ate....all were gone in a blink of an eye.

Except this one.  No one dared to eat the "pretty one".  Mom needed to get a picture!


The cake by itself was really wonderful to me. No icing was needed, but since this was for my "special guy" I wanted to make it look like a "special day" cake. I made the frosting hoping for something to mimic cream cheese. It doesn't taste as close to cream cheese as I would want, but my family liked it all the same. There was no way I could keep testing more icing and not risk getting sick. I would love to keep working on more icing, but for now I will be happy with the way it is. My family reassured me that it was great and proceeded to eat all the icing leftover in the fridge. To give more options for different diets, I am including two other recipes for whipped cream and coconut creme icing at the end of this post.
Grain-Free Carrot Cake
~created by The Gluten-Free 'Dish'

I use my electric mixer to make this cake.
Add to the mixing bowl:
5 Tablespoons chia seed ground
6 Tablespoons water
Mix well.
Add:
1/2 cup unsweetened organic applesauce +2 Tablespoons
18 drops stevia liquid
3 Tablespoons raw organic honey
5 Tablespoons organic palm shortening
1 tablespoon organic apple cider vinegar
Mix well.

Add:
1 teaspoon nutmeg
1/4 teaspoon allspice
1 teaspoon baking soda
1 1/2 teaspoon baking powder
1 1/2 cup pecan meal
1/2 cup coconut flour
Mix well.
Add:
1 1/2 cups shredded organic carrots, approximately 3 carrots, shredded (I use the food processor with the disk attachment.)
1/2 cup pecans, chopped small
1/2 cup organic raisins
Mix well.
The batter looks like this:


Line a muffin pan with natural paper baking liners. Use a medium size cookie scoop to make balls and shape and smooth with your hands. Drop them into the muffin pan.

This recipe makes approximately 15 cupcakes.
Or a 9" round layer cake, Be sure to grease cake pan and line with parchment paper cut to fit the bottom of the cake pan. Bake for approximately 15-20 minutes. Allow to cool about 10 minutes before flipping the layer cake onto a flat surface to cool.
Cashew Creme Frosting (pictured above)
1 cup raw organic cashews, soaked in water 2-3 hours rinsed and drained.
8 drops stevia
4 tablespoons coconut milk
2 tablespoons coconut oil
2-3 tablespoons raw organic honey
Place ingredients in a high powered blender like a Vita-Mix and blend
well until smooth. Spoon on top of the cakes and top with chopped
pecans if desired.
Other delicious options to replace the Cashew Cream Icing:
1. Coconut Creme Whipped Topping (Pictured on my blog here)
1 can of coconut milk, full fat, chilled in the refrigerator (I use Thai Kitchen brand)
a few drops of stevia to your taste or honey
Chill the full fat coconut milk in the refrigerator. When ready to serve remove the canned coconut milk from the refrigerator. Do not shake. With a spoon remove the fat or solid part of the coconut milk, leaving the liquid behind. Add sweetener to your taste. Whip with a hand mixer until creamy.
2. Coconut Creme Icing (pictured on my blog here)
Inspired and adapted from Elana's Pantry
1/2 cup coconut milk, full fat, cream from the top, refrigerated ahead to chill (I use Thai Kitchen brand)
1 1/2 tablespoons Lakanto
pinch of sea salt
2 1/2 teaspoons arrowroot powder
1/2 tablespoon water
1/2 cup coconut oil
In a medium saucepan on low heat combine the coconut milk creme from the top of the can with the Lakanto and salt until the dry ingredients dissolve.
In a small bowl, combine arrowroot and water to form a smooth paste and add to the saucepan.
Using a hand mixer combine the ingredients in the saucepan and bring to a boil for a second (BRIEFLY because this will thicken quickly).
Remove saucepan from the heat and blend in the coconut oil with the hand mixer.
Put the saucepan into the freezer for 20-25 minutes until the icing is solid and turns white (set a timer so you don't forget).
Remove from the freezer and mix again with the hand mixer until fluffy.
Spread on a cooled cake and enjoy.
Debbie's Notes:
1. Since this cake is egg-free and made without guar gum or xanthan gum to hold it together, it is more delicate and doesn't hold together as well as it would with those ingredients. We think it is best to eat this cake with a fork in order to avoid sharing this with your favorite four-legged friends! We don't mind using a fork, if it means we get to eat cake. Of course you get to decide how your eat your cake, but just be sure to enjoy every bite!
2 .Just so you know when I refer to "allergy-friendly." I mean that all my families allergies are accounted for. This cake uses pecan meal, so if you are truly nut allergic this may not work for you.
1. Coconut Creme Whipped Topping (Pictured on my blog here)
1 can of coconut milk, full fat, chilled in the refrigerator (I use Thai Kitchen brand)
a few drops of stevia to your taste or honey
Chill the full fat coconut milk in the refrigerator. When ready to serve remove the canned coconut milk from the refrigerator. Do not shake. With a spoon remove the fat or solid part of the coconut milk, leaving the liquid behind. Add sweetener to your taste. Whip with a hand mixer until creamy.
2. Coconut Creme Icing (pictured on my blog here)
Inspired and adapted from Elana's Pantry
1/2 cup coconut milk, full fat, cream from the top, refrigerated ahead to chill (I use Thai Kitchen brand)
1 1/2 tablespoons Lakanto
pinch of sea salt
2 1/2 teaspoons arrowroot powder
1/2 tablespoon water
1/2 cup coconut oil
In a medium saucepan on low heat combine the coconut milk creme from the top of the can with the Lakanto and salt until the dry ingredients dissolve.
In a small bowl, combine arrowroot and water to form a smooth paste and add to the saucepan.
Using a hand mixer combine the ingredients in the saucepan and bring to a boil for a second (BRIEFLY because this will thicken quickly).
Remove saucepan from the heat and blend in the coconut oil with the hand mixer.
Put the saucepan into the freezer for 20-25 minutes until the icing is solid and turns white (set a timer so you don't forget).
Remove from the freezer and mix again with the hand mixer until fluffy.
Spread on a cooled cake and enjoy.
1. Since this cake is egg-free and made without guar gum or xanthan gum to hold it together, it is more delicate and doesn't hold together as well as it would with those ingredients. We think it is best to eat this cake with a fork in order to avoid sharing this with your favorite four-legged friends! We don't mind using a fork, if it means we get to eat cake. Of course you get to decide how your eat your cake, but just be sure to enjoy every bite!
2 .Just so you know when I refer to "allergy-friendly." I mean that all my families allergies are accounted for. This cake uses pecan meal, so if you are truly nut allergic this may not work for you.
November 27, 2011
Energy Bars - Grain-free, Dairy-free
 | |||||||||||
Grain-free Energy Bars
For thanksgiving this year we were planning to travel so I made these energy bars to take along on our trip. We enjoyed them so much that they didn't make it to Thanksgiving.
If you are looking for a quick and easy recipe to energize you for the upcoming holidays ahead of us, I believe you will love this recipe.
Most of all, today, I wanted to take time to thank you for being here with me through the year. I am grateful for you, each and every one who visits here. May you be blessed.
The Lord bless you and keep you; The Lord make His face shine upon you, And be gracious to you; The Lord lift up His countenance upon you, And give you peace.
Numbers 6:24-26
Grain-free Energy Bars
2 cups pecans
1/2 cup organic "raw" cashews
3 Tablespoons raw honey
8 Tablespoons coconut oil, melted
Add ingredients to food processor and blend well. Spread the mixture into an ungreased glass 9 X 13 inch baking dish. Bake in the oven at 300 degrees for 15 minutes and allow to cool. Cut them into squares. Then refrigerate to harden.
|
October 1, 2011
Grain-free Pecan Meal Biscuits - No: gluten, grains, dairy, eggs, and sugar
 |
| Pecan Meal Spiced Raisin Biscuits |
My experience with the world of food sensitivities has been that when I eat a food too long, my body eventually revolts.
I don't always know exactly what the culprit is, but I know something is amiss. So it seems that now my body has decided it has had enough quinoa flour for the time being.
You may be thinking to yourself well, Debbie, just how do you know these things? I'll share this story just because someone may be able to relate. Over the past year I have worked on creating many quinoa flour recipes. They took a lot of work and re-working. We have enjoyed quinoa flour pizza crusts, chicken and dumplings, chicken veggy pot pie... ok you get the picture?
I ate quinoa all the time as a replacement for the gluten grains that my body didn't like. I baked and cooked and worked through the trials and error to have a working set of recipes my whole family would enjoy.
At the beginning of last summer, the boys spent a few days away at camp. Getting them ready, and preparing their meals for their time at camp, left me in an exhausted state. I didn't feel like cooking while I recovered, so I ate leftover chicken pot pie made with a quinoa flour crust. Since no one was here to eat it up in a day, I ate it over and over for 3 days.Ha! That was the test!
I became really bloated and started having irritable bowels. E-gad! How impolite of me to discuss this in front of the whole world! If you a regular reader of gluten-free blogs, you know that most gluten-free bloggers discuss this topic more freely than they ever would in "polite society." Anyway, after the bloating, I had the energy crash that always seems to follow
elimination of foods that overstimulate my system. This has been the "sign" that tells me a change is needed. My body communicates relief, and this time the energy letdown lasted for months. It isn't easy to lose energy when you don't have any extra to begin with.
Once I realized that my quinoa needed to sit on the shelf for awhile, It was time to start learning again. This time it was learning all about pecan meal. I needed to make an easy bread that was FREE of grains, gluten, dairy, eggs, sugar, and today I want to share with you what I created. For whatever reason, the learning curve was shorter this time, and I'm thankful for that. It is a good thing for my body.
Grain-free Pecan Meal Biscuits
~created by The Gluten-Free 'Dish'
Add ingredients to mixing bowl:
6 Tablespoons chia seed meal
6 Tablespoons water
2 Tablespoons raw organic honey
6 Tablespoons organic unsweetened applesauce
5 Tablespoons organic palm shortening or coconut oil (You may need to add 1 T. more at the end of mixing if the recipe is too dry.)
1 Tablespoons organic apple cider vinegar
Mix well.
2 Tablespoons raw organic honey
6 Tablespoons organic unsweetened applesauce
5 Tablespoons organic palm shortening or coconut oil (You may need to add 1 T. more at the end of mixing if the recipe is too dry.)
1 Tablespoons organic apple cider vinegar
Mix well.
1/4 cup tapioca flour
1 tsp baking soda
1 1/2 tsp baking powder - grain free
1 1/2 tsp baking powder - grain free
Choose one spice option:
1 tsp nutmeg
1/4 tsp allspice
raisins
Or:
1 teaspoon onion powder
1 teaspoon oregano
Mix well. Add raisins if desired.
Shape with your hands to make biscuits.
Makes 10-12 biscuits.
Bake at 350 degrees for 12-15 minutes on a baking sheet lined with parchment paper or greased with olive oil.
Just a few more thoughts:
After realizing that I was developing new food sensitivities I began working with a functional MD to pinpoint exactly what I need to fine tune. Over the past weeks I have been in the process of many blood draws, and specialized lab testing to determine the next steps I need to take in my healing process. I am ready for it. Fatigue and exhaustion have been a daily challenge, and I haven't been able to post here as much as I'd like to.
I know I still have changes to make to get to the place I need to be, but I can sense positive changes taking place in my body, and look forward to sharing more with you all more often.
Lot of love,
July 11, 2011
Grain-Free, Nut-Free Pizza Crust and Stevia-Sweetened Pumpkin Sauce
 |
I was delighted when my youngest son announced, after eating one of the commercial test-market gluten-free pizzas, that he liked my crust better than theirs. But then he said, he liked their sauce better than mine. Well, with the sugar content and tomatoes in the competition, I didn't stand a chance, now did I?
It's a good feeling to make those you love happy and nourish them all at the same time.
(This recipe is linked to Gluten-Free Wednesdays Blog Carnival hosted by Linda of The Gluten-Free Homemaker.)
Grain-Free, Nut-Free Pizza Crust - Allergy-friendly -No Gluten, Grains, Dairy, Nuts, Yeast, Eggs, Corn or Sugar
Grain-Free, Nut-Free Pizza Crust - Allergy-friendly -No Gluten, Grains, Dairy, Nuts, Yeast, Eggs, Corn or Sugar
Preheat oven to 400 degrees.
Place dry ingredients in a mixing bowl and stir together with a wire whisk. Set aside.
1 cup Ancient Harvest Quinoa Flour
3/4 cup Ener-G Tapioca Flour
1 teaspoon sea salt
2 teaspoons Hain Featherweight Baking Powder
Mix wet ingredients in a separate bowl and whisk together..
1/4 cup organic extra virgin olive oil
1/2 cup plus 1 Tablespoon coconut milk
1 Tablespoon Navita's Naturals chia seed ground into meal.(I grind chia seed into meal with a coffee grinder or you may purchase already ground) Or: 1 large egg
1 Tablespoons water
1 Tablespoons water
1 Tablespoon apple cider vinegar
11 drops of stevia liquid


Combine the wet and dry ingredients with a large spoon and stir well.
I find if the dough is sticky when I first start spreading, after a while, the dough magically behaves.

sheet that has been lined with parchment paper. Spread out the dough onto the paper with a spoon.
Pictured here is a 15 inch round pan. Usually, I use a heavy 11 x 14 inch stainless steel baking sheet to avoid non-stick finishes. (See note at the bottom of the page.)

Bake for 15 minutes at 400 degrees Fahrenheit.
Return pizza to the oven and bake again for 15-20 minutes.
Enjoy!
 |
| My favorite Meatball pizza! |
Stevia-Sweetened Pumpkin Pizza Sauce
I am sharing my recipe for Pumpkin sauce along with a substitution for tomato sauce. One evening I quickly mixed this together and everyone liked it. Ah, and I wrote it down! I share it with you, not because I have a special talent with making sauce, (Oh, dear, my Italian friends please look away!) I share, because I know there are many who need to avoid tomatoes. Hope this will get you started on creating a safe pizza. Enjoy!
approximately 7 oz. of Libby's pumpkin puree (about 1/2 can)*
1/2 cup water
pinch of sea salt
1 1/2 teaspoon pizza seasoning
1/2 teaspoon oregano
7 drops liquid stevia
*May substitute with 1/2 jar of Bionature Tomato Paste (7 ounce size)
Note: I do not advocate using non-stick bakeware due to the chemicals that are released when the pans are heated. I threw out or gave away all of my suspicious pans except this one. I have been using a stainless steel baking sheet for making this pizza to avoid the non-stick finish. Recently when I cleaned out my kitchen, I found this round non-stick pizza pan lurking in the oven drawer. I decided to test my pizza recipe with it to see how it would work in a round pan just in case my readers wanted to know.
It was much easier to fit in a photo, so I decided to post them anyway. Well, the crust was perfect. Now I don't know if it is because of the holes in the bottom of the pan that allow air to reach the crust or if it might be from the darker surface that make the crunchy crust. I would love to have your comments about how you solve these issues in your kitchen.
In case you want to learn more about the dangers of non-stick bakeware you may read more here.
Note: I do not advocate using non-stick bakeware due to the chemicals that are released when the pans are heated. I threw out or gave away all of my suspicious pans except this one. I have been using a stainless steel baking sheet for making this pizza to avoid the non-stick finish. Recently when I cleaned out my kitchen, I found this round non-stick pizza pan lurking in the oven drawer. I decided to test my pizza recipe with it to see how it would work in a round pan just in case my readers wanted to know.
It was much easier to fit in a photo, so I decided to post them anyway. Well, the crust was perfect. Now I don't know if it is because of the holes in the bottom of the pan that allow air to reach the crust or if it might be from the darker surface that make the crunchy crust. I would love to have your comments about how you solve these issues in your kitchen.
In case you want to learn more about the dangers of non-stick bakeware you may read more here.
February 19, 2011
Pecan Sandies - gluten-free, grain-free, dairy-free, sugar-free, egg-free

The fact is I love cookies. Another fact is that I must avoid eating most ingredients found in cookies ...wheat, gluten, grains, sugar, butter, vanilla, and now it appears egg whites. Well, let's join these two facts together...my love of cookies and my special diet needs and I find myself energized with a passion for baking. Ha, ha! I am energized. I just like the sound of that!
Over the years, I have developed "safe" cookie recipes to keep up with changes in my diet. During these years, I would wonder if anyone else would appreciate them besides me? I imagine some people would taste my "cookies" and they would call them biscuits, but don't break my heart or burst my bubble. These make me very happy. If you can eat the sugars and traditional cookies, bless your heart. Just don't mind my happiness and don't feel sorry. I love my "cookies" and they make me very happy!
Over the years, I have developed "safe" cookie recipes to keep up with changes in my diet. During these years, I would wonder if anyone else would appreciate them besides me? I imagine some people would taste my "cookies" and they would call them biscuits, but don't break my heart or burst my bubble. These make me very happy. If you can eat the sugars and traditional cookies, bless your heart. Just don't mind my happiness and don't feel sorry. I love my "cookies" and they make me very happy!
With all that out front, I share my latest "cookie" creation, because I expect my friends, who must adhere to the anti-candida diet, will really enjoy them. But knowing the many different stages to this diet, I don't want to make promises that everyone could tolerate the honey and starch. It has taken me years of healing to get to this place.
On another thought here...the past week or two I have been attempting to bake egg-free. With the newest addition of Kelly Brozyna's cookbook, The Spunky Coconut Grain-Free Baked Goods & Desserts added to my collection, I have exploded with joy in baking egg-free. This "cookie" recipe plays on Kelly's use of chia seed as an egg-replacement. Kelly has inspired me in my egg-free baking and I am thankful she has forged the path for us. This is the BEST cookbook by a very talented lady!
Now, let us begin a new chapter in our baking - egg-free "cookies" ;)
Pecan Sandies
- gluten-free, grain-free, dairy-free, sugar-free, egg-free
Preheat oven 350 degrees Fahrenheit.
Dry ingredients:
3/4 cup pecan meal
1/4 cup tapioca starch
1/2 cup coconut flour
1/4 tsp sea salt
1/2 tsp baking soda
1/2 tsp nutmeg
1/8 tsp cloves
In the mixer bowl combine:
1 tablespoon chia seed meal
1/4 cup applesauce
1 tablespoon apple cider vinegar
15 drops liquid stevia
3/4 teaspoon orange flavoring
1 tablespoon honey
1/4 cup coconut oil, melted
Add dry ingredients to the mixing bowl and beat well.
Make cookies into balls and flatten with your hand onto a cookie sheet lined with parchment paper.
Bake in preheated oven at 350 degrees Fahrenheit for about 10-12 minutes.
October 29, 2010
Quinoa Pancakes: grain-free, gluten-free, dairy-free & sugar-free


In the beginning of our gluten, dairy, and sugar free diet I had so much difficulty cooking pancakes that I began to use pancake recipes as my litmus test for cookbooks or blogs. I can not even guess how many recipes we went through, until I found Ali's pancake recipes at The Whole Life Nutrition Kitchen. Ali is a dedicated wife and mother of four precious children and amazingly she still finds time to bless us by sharing her healthy and nourishing meals. I admire her masterful abilities in the kitchen. Just visiting her blog inspires me to be more creative and absolutely makes me awfully hungry! We enjoy many of the recipes from her blog and cookbook, The Whole Life Nutrition Cookbook.
Recently, when we began eating grain-free, I wondered if I was going to have the same difficulty making pancakes as I did when we first began our gluten-free journey. I decided that I should start with the best tested recipe and work from there. I hoped that maybe with a few modifications, I could create a grain free version of Ali's Apple Cinnamon Teff Pancakes. We didn't want to miss out on our favorite pancakes, so what did I have to loose?
I knew that from previous experiences, baking with quinoa flour and coconut flour, I would need to have different proportions of flours and liquids. Both flours tend to be very dry and absorb liquid. While I was at this experiment, why not see how they would taste with a little less honey and drop in some stevia. Amazingly, my first test turned out delicious-crunchy on the outside and fluffy on the inside. No changes needed.
I love it when kitchen experiments turn out so well that it fuels me to keep going just when I needed it most.
If you love pancakes as much as we do, and want a grain-free version, then I think you will enjoy this recipe. A great big thanks to my friend, Ali. May you be blessed as you are a blessing.
Quinoa Pancakes
Grain-free, gluten-free, dairy-free, sugar-free
Mix the following dry ingredients together in a large mixing bowl:
1/2 cup coconut flour
1/2 cup tapioca flour
2 teaspoons baking powder
3/4 teaspoon baking soda
1/2 teaspoon sea salt
1/2 teaspoon allspice
1/2 teaspoon nutmeg
Set aside.
In a separate bowl, mix the following wet ingredients together:
2 1/2 cups coconut milk, lite
1/2 cup applesauce, unsweetened
2 large eggs
3 tablespoons virgin coconut oil, melted (need extra for greasing the pan)
1 tablespoon honey
15 drops of liquid stevia - I use Body Ecology Stevia*
While I mix the ingredients together, I begin to heat a very large stainless steel frying pan over medium low heat. (My pan is very heavy and takes a while to heat)
Sprinkle a few drops of water onto your pan. If it 'dances' or jumps from the pan with a sizzle, the pan is ready for the batter.
Melt approximately a tablespoon coconut oil, or enough to cover the bottom of the frying pan. Using a ladle, a measuring cup or spoon, pour the batter onto the hot frying pan. Cook pancakes on first side until bubbles form along the edges and the bottom is brown. Using a spatula turn them over and cook on the other side until browned. Remove from the pan and enjoy with your favorite toppings.
A few links to some of our favorite recipes at The Whole Life Nutrition Kitchen
*Body Ecology Stevia Conversion Chart
1 cup sugar= 1 teaspoon liquid or powder
1 tablespoon sugar= 1/4 teaspoon powder, 6-9 drops liquid
1 teaspoon sugar= pinch to 1/16 teaspoon powder, 2-4 drops liquid
While I mix the ingredients together, I begin to heat a very large stainless steel frying pan over medium low heat. (My pan is very heavy and takes a while to heat)
Sprinkle a few drops of water onto your pan. If it 'dances' or jumps from the pan with a sizzle, the pan is ready for the batter.
Melt approximately a tablespoon coconut oil, or enough to cover the bottom of the frying pan. Using a ladle, a measuring cup or spoon, pour the batter onto the hot frying pan. Cook pancakes on first side until bubbles form along the edges and the bottom is brown. Using a spatula turn them over and cook on the other side until browned. Remove from the pan and enjoy with your favorite toppings.
A few links to some of our favorite recipes at The Whole Life Nutrition Kitchen
Subscribe to:
Posts (Atom)
LinkWithin
